
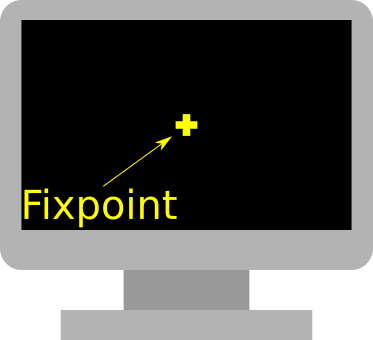
Definiton: A fixation
point is a point on the screen participants should look at. This is
often used at the beginning of a task. Many psychological experiments
use a fixation point.
The purpose of a fixation point is:
-
to make sure participants look at the screen
-
to make sure participants look at the right place of the screen
-
to make sure participants are concentrating on the task (and not looking, for example, outside or on their phone)
Fixation points can have different shapes. For example, it can look like a plus symbol, a dot, a circle. In experiments with children, it can be a funny animation.
Fixation points are easy to create in PsyToolkit. We show 3 different ways of doing it.
Example 1: A simple static fixpoint
See it yourself
First run the example to see what it does. Note that there is not just the fixation point, but there is also a task. The task is kept very simple (you see a mouse face and you need to press the space bar in response). The task is not the topic of this lesson, so it is kept minimal and otherwise pretty uninteresting (it just measures and saves response speed).
The fixation point is a bitmap of a yellow plus. It is made with Inkscape (lesson here). You can see the screen recording of how I have done it as well.
Code explained
Below, you see the experiment source code.
bitmaps (1)
  fixpoint (2)
  mouseface

task fixpoint (3)
  keys space (4)
  show bitmap fixpoint (5)
  delay 300 (6)
  clear 1 (7)
  show bitmap mouseface
  readkey 1 5000
  clear 2
  delay 1000
  save RT

block test (8)
  tasklist (9)
    fixpoint 5 (10)
end| 1 | Tells computer which bitmaps to load (each bitmap must exist as PNG file) |
| 2 | Tells the computer that there is a bitmap fixpoint.png, which is just called fixpoint here |
| 3 | The task section tells the computer how to run one trial |
| 4 | Tells the computer that only the space bar is used as a response key |
| 5 | Tells the computer to now show the fixpoint. Now X/Y position is given, so it will be shown at screen center |
| 6 | Keep the fixpoint there for 300 ms before doing anything else (i.e., delay) |
| 7 | Now clear the fixpoint. The fixpoint was the 1st stimulus to be shown. |
| 8 | In the block section, we tell computer which task to run |
| 9 | We tell which tasks to run in the tasklist part of the block |
| 10 | The task fixpoint will be called 5 times. Don’t forget the end after the tasks in the tasklist. |
Example 2: A flashing fixpoint
See it yourself
The task is the same as in Example 1, just that now the fixpoint is flashing. The advantage of this is that this attracts the participants attention more, and the participant is likely to look at it (it is difficult to ignore something flashing).
Code explained
Below, the main differences from the first fixpoint example are explained.
bitmaps
  fixpoint
  mouseface

task fixpoint
  keys space
  show bitmap fixpoint (1)
  delay 200  (2)
  hide 1  (3)
  delay 200 (4)
  unhide 1 (5)
  delay 200 (2)
  hide 1 (3)
  delay 200 (4)
  unhide 1 (5)
  delay 200
  clear 1 (6)
  show bitmap mouseface
  readkey 1 5000
  clear 2
  delay 1000
  save RT

block test
  tasklist
    fixpoint 5
end| 1 | We show the fixpoint just as usual. Note that this is the first stimulus shown, so the computer knows it as stimulus 1. |
| 2 | We keep it on screen for 200 ms |
| 3 | We let it disappear with hide. We want to hide stimulus 1, so that is the number we use here. |
| 4 | We leave it hidden for another 200 ms. |
| 5 | We then let it appear again with unhide 1. |
| 6 | At the end, we destroy it for good with a clear. |
| Instead of using hide and unhide, you can also just show and clear the same stimulus. The only difference is that the latter method increases the stimulus counter, which then can make the code it bit harder to work with. |
Example 3: An animated fixpoint
See it yourself
Example 2 was nice because it attracted attention. Now we are going to use a slightly different technique to make the fixpoint grow and shrink. For this, we just display 3 different images quickly one after another. As with the flashing, it is this sort of display that attracts people’s attention more strongly, and it can look "cool".
Code explained
bitmaps
  fixpoint1
  fixpoint2
  fixpoint3
  mouseface

task fixpoint
  keys space
  show bitmap fixpoint1 (1)
  delay 100
  show bitmap fixpoint2 (2)
  delay 100
  show bitmap fixpoint3 (3)
  delay 100
  clear -1 (4)
  delay 100
  clear -2 (5)
  delay 100
  clear -3 (6)
  delay 100
  show bitmap mouseface
  readkey 1 5000
  clear 4
  delay 1000
  save RT

block test
  tasklist
    fixpoint 5
end| 1 | show the smallest fixpoint |
| 2 | show the medium fixpoint. Because this one is bigger than the first one, we do not even need to clear the first one |
| 3 | show the largest fixpoint. Again, this one is bigger than the first, they all overlap each other |
| 4 | Now we start the shrinking. We remove the largest with clear -1. The -1 removes the last presented stimulus. Instead of -1, you could als osay 3 to refer to the third stimulus. |
| 5 | We continue the shrinking, we remove the medium fixpoint (the one that was show two stimuli ago). Instead of -2, you could also say 2, to refer to the 2nd stimulus. |
| 6 | We remove the first one (shown 3 stimuli ago, hence -3). Instead of -3, you could also say 1 to refer to the first stimulus. |
| The minus signs in referring to stimuli is just a matter of convenience. |