
What the Stroop task is
The Stroop task is one of the best known cognitive psychological experiments. First make sure you understand what it is about by reading the lesson about the phenomenon itself.
In short, in this task you need to name the "ink" color of the words. Thus, if you see the word "red" written in green ink, you need to say "green", and not "red". It turns out this is not at all easy.
This lesson not only teaches you how to present the Stroop task itself, but also how to use feedback, which is a bit sophisticated.
See it yourself
First run the example to see what it does (this is the same as in the other Stroop lesson).
Images = Bitmaps
| A "bitmap" is just a more technical term for an electronic image, like a digital photo. |
Almost every experiment will have some images to be shown. This is a key aspect of every experiment. The computer needs a name for these. Typically, images have an "extension", such as ".jpg" for jpeg files, or ".png" for png files. Most digital photos you take are in jpeg format, but many pictures on the internet are in png format. PsyToolkit can work with any format, but png is the default format.
Below is an example of two pictures:
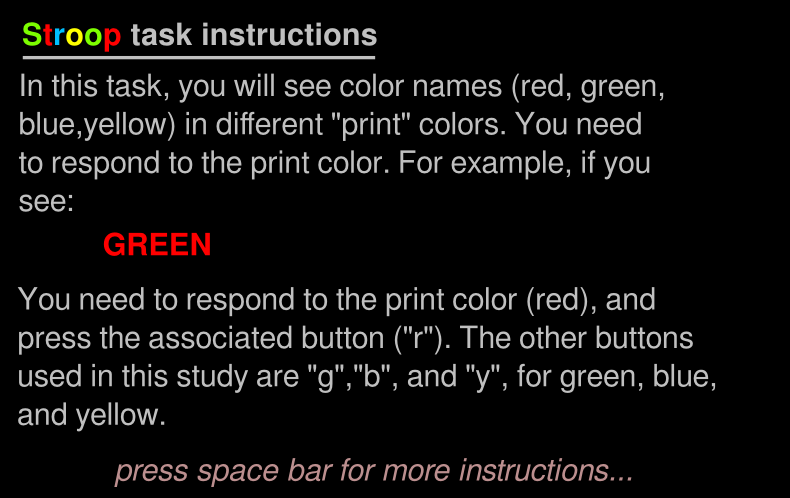
Example bitmap instruction1.png
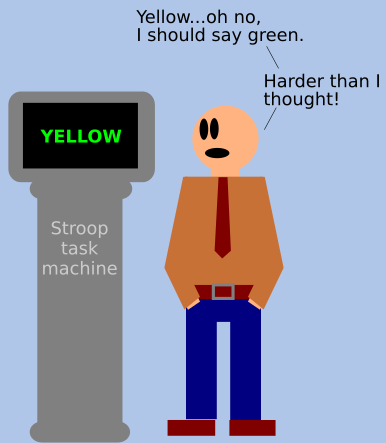
The image below is made with Inkscape and has a lot of the instructions. The reason why PsyToolkit relies on Inkscape made images so much is that Inkscape is just a great program to make images with. Of course, you can use other software as well, you can even make png images with PowerPoint.
| This picture is 790 pixels wide and 490 pixels high. That way it easily fits in the default screen size PsyToolkti works with (800x600). One pixel is the smallest unit of a bitmap, it is like one little dot in the image. |
Example bitmap yellowgreen.png
The picture below is one of the import stimuli use. For each color word, such as yellow printed in green ink, there is one bitmap.
| This picture is 315 pixels wide and 81 pixels high. |

Code explained
| The "code" is a just a number of text lines which follow a specific set of coding rules. Anyone can do this. Many psychology students learn this for their own experiments. It is often easiest to start with an existing one and then just gradually change it (and test what happens every time you change a line). |

Below, you see the experiment source code with annotations. Before you start reading, note that there are a few important things to note about PsyToolkit experiment code:
1) There are different "sections". Sections such as "bitmaps", "task", "table", "block" are all separated from one another by an empty line.
2) When the computer runs the experiment, it starts really with the first "block" section there is. So in order to understand how the experiment is carried out, you should scroll down a bit and look for a line starting with "block".
3) The "task" section describes one trial. The computer executes this line for line. Some lines do stuff, such as showing an image on the screen, whereas other lines just tell the computer on what information it has to have (e.g., which keyboard keys are being used in this task).
4) The "block" section tells the computer how many trials there are. If you have instructions or feedback after the trials have been done, this all should be in the block.
bitmaps (1)
  instruction1 (2)
  instruction2
  correct
  mistake
  fixpoint
  yellowyellow
  yellowgreen  (3)
  yellowblue
  yellowred
  redyellow
  redgreen
  redblue
  redred
  greenyellow
  greengreen
  greenblue
  greenred
  blueyellow
  bluegreen
  blueblue
  bluered

fonts (4)
  arial 20 (5)

table stroop (6)
  "yellow yellow 1" yellowyellow 4 (7)
  "yellow green  0" yellowgreen  2 (8)
  "yellow blue   0" yellowblue   3 (9)
  "yellow red    0" yellowred    1 (10)
  "red yellow    0" redyellow    4 (11)
  "red green     0" redgreen     2
  "red blue      0" redblue      3
  "red red       1" redred       1
  "green yellow  0" greenyellow  4
  "green green   1" greengreen   2
  "green blue    0" greenblue    3
  "green red     0" greenred     1
  "blue yellow   0" blueyellow   4
  "blue green    0" bluegreen    2
  "blue blue     1" blueblue     3
  "blue red      0" bluered      1

task stroop  (12)
  table stroop  (13)
  keys r g b y  (14)
  delay 500  (15)
  show bitmap fixpoint  (16)
  delay 200  (15)
  clear 1  (17)
  delay 100  (18)
  show bitmap @2  (19)
  readkey @3 2000  (20)
  clear 2   (21)
  if STATUS == CORRECT   (22)
    show bitmap correct   (23)
  fi    (24)
  if STATUS != CORRECT    (25)
    show bitmap mistake   (26)
  fi  (24)
  delay 500  (15)
  clear 3   (27)
  save BLOCKNAME @1 TABLEROW KEY STATUS RT   (28)


block training   (29)
  message instruction1   (30)
  message instruction2   (31)
  tasklist   (32)
    stroop 40    (33)
end (34)| 1 | First thing is to tell the computer which bitmaps (images) we want to show in this experiment. If they are in PNG format, you only need to give their name without the png extension. In this experiment, all images were made with Inkscape and saved as png files. |
| 2 | There is no specific order for the images. The first one listed here is one of the instruction screens, here called instruction1 (there is a file instruction1.png). When the computer sees this line, it stores the image in its memory and can later present it if we tell the computer to do so. |
| 3 | Another bitmap, in this case the above described yellowgreen.png bitmap |
| 4 | A fonts section is only necessary if you actually use fonts/text in your experiment. That is not always the case. In this experiment, we use fonts in the feedback for participant section. Note that all the other colored words are actually just images, see below). |
| 5 | The font we use here is "arial" and the font size is 20 points. Because there is only one font, whenever we use text, the computer will use this one and only defined font. |
| 6 | In most experiments, we have a number of conditions. In PsyToolkit, conditions are typically described in a table. There can be more than one table. In this case, we only have one table and we give it the name "stroop". You can call them whatever you like. |
| 7 | This first row of the colum has three different elements. The first element is in quotes, it is a human readable string and contains the name of the word and the color of the words presented. The second element is the name of the stimulus (referring to a bitmap, see above), called yellowyellow. Yellow is the work "yellow" in yellow ink. The last number "4" refers to the specific key to be pressed in this condition. We want that participants press the fourth key of the keys defined below (r, g, b, y, see line 14). |
| 8 | Similar to the previous line. The main difference here is that we show a different stimulus, and expect a different key to be pressed. |
| 9 | Similar to the previous line. |
| 10 | Similar to the previous line. |
| 11 | Similar to the previous line. |
| 12 | Now we describe the trial. A trial takes a few seconds and is when people see the stimulus, respond to it, get direct feedback about error or success, and the data being stored. The task is called "stroop". |
| 13 | We tell the computer that the table with experimental conditions belonging to this task is called "stroop". It is the table above. |
| 14 | We tell the computer that in this task, only 4 different keys are expected, namely the r, g, b, and y (they correspond of course to the colors red, green, blue, and yellow). |
| 15 | We tell the computer to do nothing for half a second (one second has 1000 ms). All timing in PsyToolkit is done in milliseconds. We do nothing because otherwise things go too fast for our participants. |
| 16 | We now show the fixation point. A fixation point is something shown to catch people’s attention to the screen. |
| 17 | We now do nothing for 200 ms (1/5 of a second). This is the time during which just the fixation point is on screen. |
| 18 | Now we clear the first stimulus. The first stimulus is of course the bitmap fixpoint we just showed. |
| 19 | Now we show a bitmap. Which one? The one that is described in the second column of the table. Now look at the table. Note that everything in quotes counts here as just one column. Every trial, the computer randomly chooses a row from the table. Thus, if the computer had on a trial chosen the first row, the computer would now show bitmap "yellowyellow". |
| 20 | This tells the computer to wait up to 2000 ms until one of the four possible keys (r g b y) has been pressed. The computer knows that the correct key is described in the third column of the table. Thus if the computer is working with the first row of the table on a given trial, it will assume that the correct response key is 4, that is "y". |
| 21 | Now that a key has been pressed (or 2000 ms have been passed without the participant pressing), we tell the computer to "clear" the second shown stimulus from the screen. That is the colored word we had just been showing. |
| 22 | Note that the computer by know knows if the participant had been pressing the correct key or not. This is saved in a variable called "STATUS". If it’s value is CORRECT (or 1), then we go on with the next line. Note that "==" stands here for "is equal to?" The "==" notation is commonly used in computer science. |
| 23 | Which is to show the "correct" bitmap. |
| 24 | This just tells the computer that this is the end of the if..then section in which the bitmap would have been shown if the participant had responded correctly. |
| 25 | Now similar to point 22, we check if the STATUS was not correct. Note that != means "is not". Thus if the status is not correct, we do the following lines until we read "fi". |
| 26 | And if the status was not correct we show the "mistake" bitmap. |
| 27 | Now we clear the feedback stimulus. |
| 28 | Now the trial is basically over. All is left to do is to tell the computer that the important information of this trial needs to be stored to the data file. Note that in PsyToolkit, you need to tell exactly what you want to be stored. In this case, we save the name of the block, the first element of the table (the stuff in quotes), the row number of the table, the key being pressed, the status, and the response time. |
| 29 | This is really where the computer starts! The block contains information of which trials of which tasks need to be done. |
| 30 | We start with showing an instruction bitmap. The "message" instruction will wait for a spacebar key press. |
| 31 | We show a second instruction (often, one screen with instructions is not enough). |
| 32 | The tasklist tells the computer how many trials of which task need to be done. We only have one task in this experiment (called stroop) |
| 33 | We want 40 trials of that. That means, the participant will do the task 40 times, and there will be 40 responses in the data file. |
| 34 | This tells the computer that we are at the end of the tasklist. Typically, there is only one task, but there are experiments where there is more than one task. |
Feedback to participants explained.
The code has the following code as the last bit of the block. It is not necessary to do the experiment, but it is actually really nice to have participant feedback for participants.
| Study this only when you understand the basics above. Feedback is a bit of an advanced subject in PsyToolkit coding. |
  feedback (1)
    text -100 0  "Your speed in correct trials"  (2)
    set &StroopCon mean c8 ; select c4 == 1 && c7 == 1  (3)
    set &StroopInc mean c8 ; select c4 == 0 && c7 == 1  (4)
    set &StroopEffect expression &StroopInc - &StroopCon  (5)
    text -100 50  &StroopCon ; prefix "congruent: " ; postfix " ms" ; select c4 == 1 && c7 == 1  (6)
    text -100 100 &StroopInc ; prefix "incongruent: " ; postfix " ms" ; select c4 == 0 && c7 == 1  (7)
    text -100 150 &StroopEffect ; prefix "Your Stroop effect (incongruent - congruent): " ; postfix " ms"  (8)
    text -100 200 "Press space key to end"  (9)
end (10)| 1 | The feedback section starts here. |
| 2 | This simply shows the text in quotes at location -100 0. Often you need some introducing text in feedback just like this. |
| 3 | This like creates a new global Psytoolkit variable. It takes the mean value of the 8th column of the current data file. Further, the "select" tells the computer only to take those lines which have as 4th column (c4) a 1 and (&&) on the seventh column (c7) a "1". The 4th column are the congruent trials, and the 7th column indicates correct trials, "1" being correct. |
| 4 | Similar to the previous line, we now set a new global variable holding the mean response time in the incongruent trials. The select bit takes only correct trials (c7==1) and incongruent trials (c4==0). The && means that we want both c4==0 to be c7==1 to be logically true. Also note the spaces between all basic elements. This is necessary. |
| 5 | Now we calculate the Stroop effect, which is simply the two just calculated variables minus each other. |
| 6 | Now we start showing the results on the screen. We tell the computer here to present the variable &StroopCon, which is the response time in the congruent trials. Before the number (prefix) we say "congruent: " and after the number " ms". Notice that the spaces in the quotes give us some extra space. |
| 7 | This line is similar to the previous one, just for the incongruent response times. |
| 8 | This line is again similar to the previous one, we just present the last variable we want to tell the participant about. |
| 9 | We just show some text on PsyToolkit coordinate -100 200. Feedback screens are visible until participant presses space bar. |
| 10 | The "end" tells the computer that the feedback section is now finished. |